You LOVE the idea of using a teacher toolbox to keep your little things organized…but don’t love the color options.
I’ll admit. The black and white options weren’t really my style either.
So, I’m here to walk you through the steps to a DIY complete makeover of your teacher toolbox. 😍
By the end of this blog post, you will have a beautiful toolbox that allows you to stay organized AND is cute to look at. 🤩

Step 1: Find the Perfect Teacher Toolbox
There are SO many different types of teacher toolboxes out there.
When it comes to choosing the perfect one for you, here are a couple of suggestions:
1️⃣ How many drawers do you want? (aka How many supplies do you want to organize?)
2️⃣ Do you care about the size of the drawers?
3️⃣ Does the height of the toolbox matter to you? (Are you trying to store it on a shelf?)
Answering these questions will help you choose the toolbox that works best for you.
I LOVE the Akro-Mils 26-drawer organizer. Grab the exact one from my Amazon top 30 picks for new teachers list.

It is the perfect size for all I want to store and the different-sized drawers help me store some larger items like scissors or pens.
Step 2: Spray Paint (if you want to)
So, my toolbox isn’t white or black, but blue.
I get a lot of questions about where I found a blue teacher toolbox.
And the answer is…I made it!
Spray painting your teacher toolbox is actually pretty simple. 👏
Here are the steps I followed for my own toolbox makeover:
➡️ First, remove all of the drawers.
➡️ Next, lay down a trash bag outside or wherever you will be spray painting.
➡️ Then, place the toolbox on top of the trash bag and spray paint.
➡️ Next, let the toolbox dry, and then add another coat of spray paint.
➡️ Finally, put all of your drawers back in!

To create my toolbox, I used a matte blue paint in the Rust-oleum brand.
Step 3: Find the Perfect Labels
Find some labels that fit with the rest of your classroom decor, or bring a pop of color to your classroom!
You can check out all of my teacher toolbox label styles here!
Once you have found the perfect labels, customize them as needed to identify all the little supplies your drawers will hold.

If you are using my editable teacher toolbox labels, you will need to use PowerPoint to type in the boxes and change what they say!
Then, you can to print and cut them. I highly suggest printing the labels on cardstock paper.
I’ve tried printed the labels on regular printing paper before and they look pretty flimsy and bend a LOT.
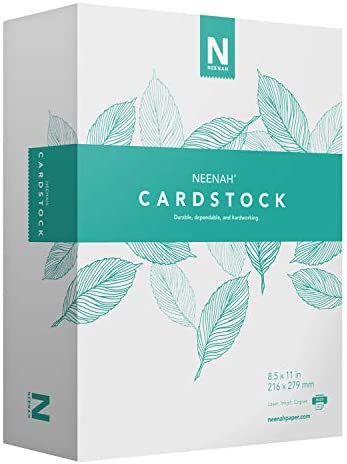
If you are looking for cardstock to use, I love Neenah cardstock from Amazon, grab it off of my Amazon list.
Step 4: Put it all Together
Now for the fun part – putting it all together to complete your masterpiece!
To attach the labels to your teacher toolbox, there are two different ways you can go.
One option is to use clear Scotch tape.
Add some tape to the back of the labels and press them onto the drawers.
The other option is to use hot glue.
Similarly, add some hot glue to the back of the labels and press them onto the drawers.
Either way, you are creating something that will look something like this. 😍

This is a fun way to keep yourself organized.
Hopefully, it will not only help keep your teacher’s desk more clean and organized but will also bring some joy into your classroom. ❤️
If you are still looking at your teacher desk and feeling overwhelmed with the amount of papers cluttering your space, I’ve got you!
Here are some great ideas on how to keep that aspect of your teacher desk organized in this blog post!