Have you ever stumbled upon a classroom decor theme that looks exactly like the classroom of your dreams? Oftentimes, you can start to scroll through the files you have bought and slowly become overwhelmed with what this decorating project will entail. Follow these 7 simple steps to turn your dream classroom into reality.
1. Choose your Classroom Decor Theme
If you haven’t done so already, first choose a theme from Teachers Pay Teachers or Etsy! You can use the search engine on TpT or Etsy to look for any type of theme, OR here are some of my favorite classroom decor themes 🙂


2. Download Files and Make Edits if Needed
Now that you have purchased your decor bundle, you will want to pick and choose which items you plan to use. I like to move the files I want into a separate folder so it’s easy to navigate when I go to edit and print. 🙂
Then, it’s time to use the editable files to customize items for your classroom!
(Note: not every decor bundle includes editable files of everything, you will want to check the description first and make sure you can edit what you need.)
For example, you may want to choose your own classroom rules, type students’ names on the nametags, customize the hand signal posters for your classroom, edit labels to match what is stored in your carts and bins, and more!

With my Happy Hues bundle and Modern Calm Colors bundle, EVERY piece can be customized, so you can change the text or font on all of it!
Also, if you buy any of my sets, I always embed the fonts for you! That means you can use the same cute fonts that I’ve hand-selected for each theme without having to purchase the fonts individually. 🙂
If you buy a bundle with embedded fonts and they are missing for some reason, head to this blog post to see how to fix that!
3. It’s time to Print!
Printing From Home
I personally love using my home printer to save money when printing everything. For items that need to be more durable, I will print them on white cardstock paper. Don’t forget to change the paper setting to “thick paper” if you do this. I order my white cardstock paper from Amazon in bulk and it lasts a long time!
In addition, to avoid getting a thick white border around the pages, I recommend choosing the print settings below (“Actual Size” and “Choose paper source by PDF”). There will likely still be a white border when you print, but this will make the border as small as possible. 🙂

Printing at a Local Print Shop
If you would prefer to print the items at a printing shop, I recommend choosing a local, smaller print shop as they are typically more affordable than the big brand print shops.
Also, always ask and see if they have a teacher discount as sometimes that is offered at the local shops!
I recommend printing everything on premium paper (slightly thicker than regular printing paper).
This will ensure the quality of colors and is less expensive than cardstock, since it can get pricey when printing on cardstock at a printing shop.
4. Cut and Laminate the Items you Wish to Use
The cutting can take quite a bit of time. I like to get comfy on the couch and indulge in my favorite TV show while I cut everything out. 🙂
I use this paper cutter- it is a LIFE SAVER. It saves so much time and makes sure the lines of my finished items are always super straight.

5. The Fun Part- Decorating your Classroom with your Classroom Theme!
You’re almost ready to decorate your classroom… but first I recommend going through your cabinets and bins and decluttering everything.
If you’re like me, you may have inherited a classroom filled with stuff. (If not- YAY for starting with a clean slate 🥳)
You’ll want to go through the cupboards, cabinets, and every tiny corner and donating items you realize you no longer need. That way you can be organized and start with a clean slate!
Now for the fun part- decorating and hanging your decor items on the walls of your classroom!
Start with the largest items first: the alphabet set, large bulletin boards, a number line, etc. This ensures you will have space for those items, and then you can use the smaller items to fill in the gaps around those bigger displays in your classroom 🙂

When hanging items with lots of pieces, such as the birthday display, I like to lay all of the pieces on the floor the way I want it to look on the board.
This gives me a good visual of how much space the display will take.
From there, I use washi tape to hang the items temporarily on the bulletin board, so I can move them around if needed.
Once everything is arranged beautifully, I staple the pieces in place!
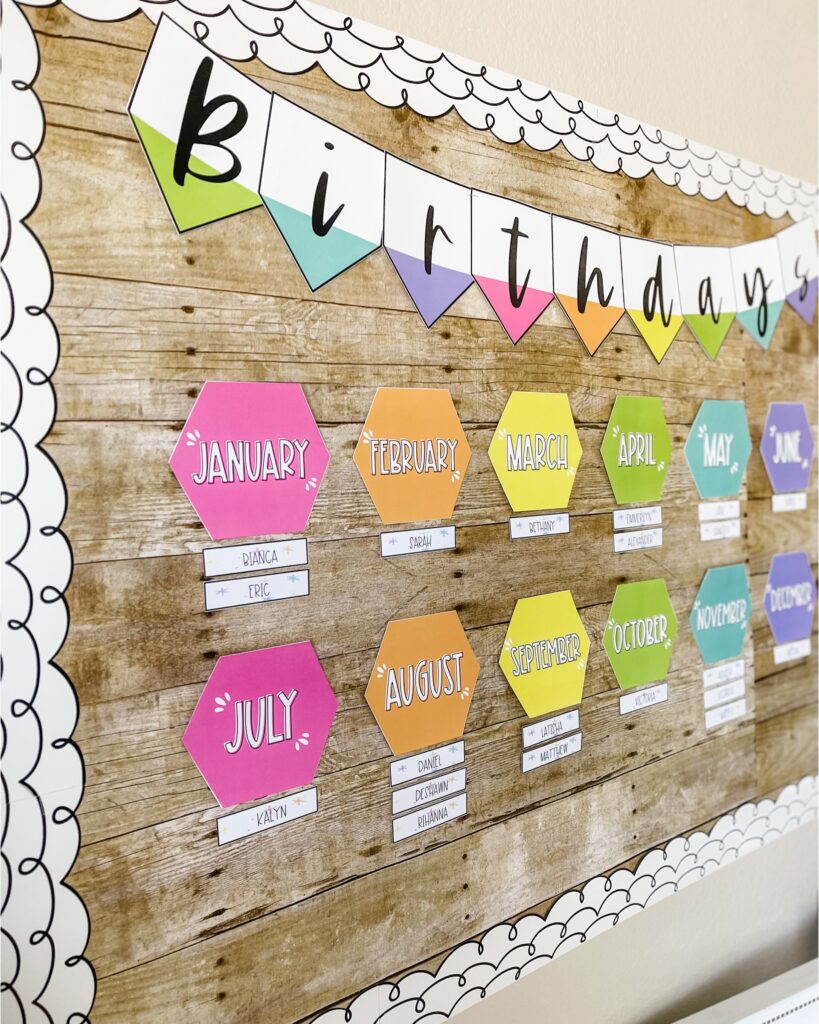
Also, this wooden bulletin board paper is the fadeless brand from Michaels- it is my absolute favorite!
6. Organize alllll the Things
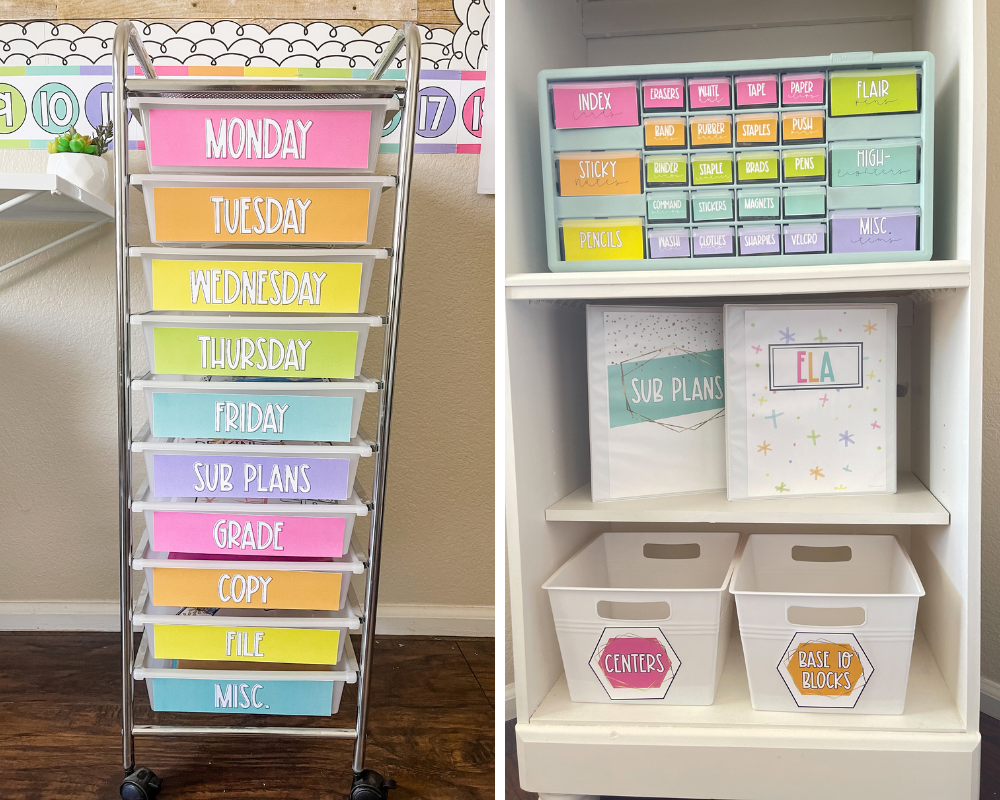
Once the bulletin boards and walls are completed, I like to create labels using the editable files to label my carts, bins, etc!
I love having everything labeled because 1- I can quickly find what I need, and 2- It’s cute! 😍
7. Add your Finishing Touches to Make it a Space you Love!
From here, you can add little touches to make it a space YOU love. For example, I love to add pictures of my family and friends around my desk, as well as adding fake plants sprinkled around the classroom to make it feel a little more home-y.

I’ve seen others make their classroom more home-y by adding rugs, lamps, twinkling lights, and letter boards!
I love seeing how teachers use my decor bundles to bring their classrooms to life! Please tag me @shaynavohstpt on Instagram so I can see all of the beautiful and creative ways you find to use these resources!